
レビュー内では
「KPS/ABS」「合わせ目」「スミ入れ」
など、ガンプラ用語が出てきます。
意味がわからない場合は、先にガンプラ用語記事を読んでおくと理解しやすいです👇
RG 1/144 フォースインパルスガンダム SpecIIを購入しようか迷っているけど、キット内容はどうなのか気になりませんか?
果たしてRG 1/144 フォースインパルスガンダム SpecIIは、
- この値段に見合っているのか
- 初心者でも簡単に作ることが出来るのか
このようなことを購入前に知っておきたいですよね!
そこで、記事ではRG 1/144 フォースインパルスガンダム SpecIIを初心者の目線で分かりやすく徹底レビューをしていきます!
この記事を読むことでRG 1/144 フォースインパルスガンダム SpecIIの特徴や気になる点が分かります!
 とも
ともぜひRG 1/144 フォースインパルスガンダム SpecIIを購入する際の参考にしてみてください!
『機動戦士ガンダム SEED FREEDOM』に出てくるルナマリア・ホークが搭乗するモビルスーツです。
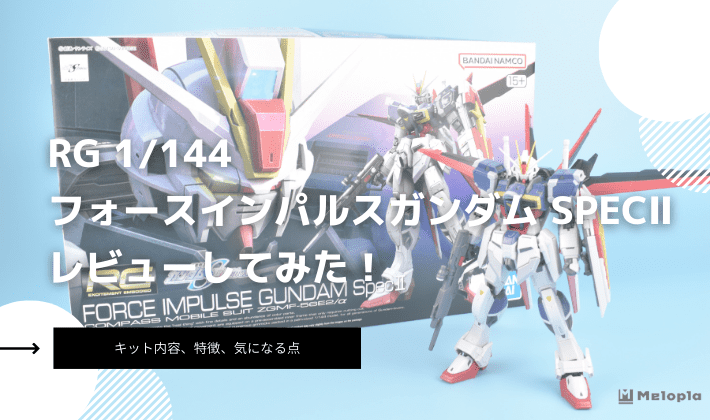
RG 1/144 フォースインパルスガンダム SpecIIのキット内容
はじめにキット内容を紹介していきます。


| 発売日 | 2024年02月10日 |
| 価格 | 3,410円(税込) |
| 対象年齢 | 15才以上 |
RG 1/144 フォースインパルスガンダム SpecIIの内容物
- RG 1/144 フォースインパルスガンダム SpecII
- 高エネルギービームライフル×1
- 機動防盾×1
- ヴァジュラビームサーベル×2
- フォールディングレイザー対装甲ナイフ×2
- シルエットフライヤー×1
- コアスプレンダー用パーツ×1式
- ハンドパーツ×1式
- ジョイントパーツ×1
- リアリスティックデカール×1
- フィギュア×1
RG 1/144 フォースインパルスガンダム SpecIIのレビュー
続いて、組み立て後のレビューをしていきます。

RG 1/144 フォースインパルスガンダム SpecIIの評価
| 価格 | |
| 作りやすさ | |
| 可動域 | |
| スタイル | |
| ディテール |
※RG(リアルグレード)を基準に評価しています。
※あくまでも一個人の評価です
※「良◎→○→△→×悪」の順で評価しています。
映画『機動戦士ガンダムSEED FREEDOM』に登場する機体をベースに発売されたRG 1/144 フォースインパルスガンダム SpecII。

フォースインパルスガンダム SpecIIは、インパルスを秘密裏に改修したもので、映画内のSpecIIや弐式とは異なり、カラーリング以外に特に変更された点は無いです。
カラーリングは、VPS装甲の電圧が変化したことで、全体的に暗く、ややくすんだ色合いに変わり、ブルー部分は紫色がかった色合いになっています。
RG 1/144 フォースインパルスガンダム SpecIIは、細すぎず力強さも感じられるバランスのプロポーションを備えており、ディテールも適度に追加され、分割も細かく精密です。

MSジョイントの使用箇所は胸部とコアスプレンダー部分のみで、ABS素材が使われていますが、ポリキャップは使用されず、全てKPS素材の関節が使われています。

RG 1/144 フォースインパルスガンダム SpecIIは、肩に新規パーツを使うことで配色が再現されており、胸部や膝の微細な黄色部分なども、別々のパーツとして再現され、成形色でしっかり色分けされています。
 とも
ともフォースシルエットのカラーリングは少しの変化のみで、他はあまり変わらない印象です!
特徴
ここではRG 1/144 フォースインパルスガンダム SpecIIの特徴を紹介します。
各部位の詳細
RG 1/144 フォースインパルスガンダム SpecIIの顔つきは格好良くシャープに仕上げられ、頬ダクトなどもくっきりと表現されています。

アンテナも非常にシャープですが、細くて破損しやすいので注意が必要です。
ツインアイ周りはクリアパーツで再現されています。
胴体には適度なディテールが追加され、バルカンなども別パーツで再現されています。

V字部分も別パーツ化されており、先端も丸くならずにシャープに仕上げられています。
コクピットは開閉可能です。

腰にはライフルを取り付けることができ、サイドアーマーの収納ギミックも再現されています。


肩アーマーには、新たなパーツが使用されていますが、造形自体は変わっていません。

前腕も適度に太く、前腕のロール機能により、シールドなどの装備をしても、細かい位置調整が可能です。


腰アーマーには裏打ちがあり、股関節軸が下方向にスイングできるギミックがあります。


脚部は全体的に落ち着いた色合いに変化し、合わせ目もなく、細かいディテールが開口されて別パーツ化されています。

ふくらはぎのスラスターダクトはスイング可能です。

足裏には肉抜きがなく、つま先が可動します。


RG 1/144 フォースインパルスガンダム SpecIIの可動範囲はMSジョイントがほとんど使われないため、剛性がしっかりしており、調整も簡単です。

肩も十分にスイング可能です。

腰部分で胴体を左右に振ることもでき、下半身の可動も優れており、接地性も良く、全体的に動かしやすい作りになっています。

フォースシルエット
RG 1/144 フォースインパルスガンダム SpecIIのフォースシルエットの赤色は、暗めの色合いに変化しています。

造形自体は変わっていないため、ノズル周りなどは密度のある造形が施されています。
ウイングは下方向に折りたたみ可能で、基部で回転も可能です。


ボールジョイントなので、上下のスイングも自在に行えます。

各々のメインノズルは可動し、内部のディテールも非常に細かく表現されています。

下部にあるスラスターユニットもボールジョイントで、スイングと回転が可能です。


基部のカバーを開けることでバーニアが展開し、先端のノズルには、内部ディテールがしっかりと再現されています。


コアスプレンダー
RG 1/144 フォースインパルスガンダム SpecII本体は上半身、下半身、そしてコアスプレンダーに分かれています。

コアスプレンダーには、機首やウイングが収納されているので、展開させる必要があります。

その後、好みに応じて機体下部にランディングギアやウイングにミサイルランチャーをセットします。

キャノピーはもちろん開閉可能です。

これで変形は完了です。

チェストフライヤーは、肩関節を引き伸ばすことで、90度傾けたまま跳ね上げが可能です。


また、胸部装甲が可動し、頭部部分を隠せるようになっています。

腕の位置を調整し、ライフルとシールドを装着すれば、チェストフライヤーが完成します。

レッグフライヤーも単純な変形で、膝をクランク状に曲げ、つま先を伸ばすだけです。

これでレッグフライヤーが完成します。

左から「コアスプレンダー」→「チェストフライヤー」→「レッグフライヤー」を並べてみました。
 とも
ともディスプレイスタンドが足りていないのはご了承くださいませ😅
もちろん、シルエットフライヤーも引き続き付属しています。

構造は変わらず、各シルエットとの合体時には機体後端部のジョイントを引き伸ばしてドッキングさせれば完成です。


武装
RG 1/144 フォースインパルスガンダム SpecIIのビームライフルは成形色が変更されただけで、造形は同じです。

合わせ目は段落ちモールド化され、センサーとグリップは可動します。


シールドも展開ギミックを含め、違いは成形色のみです。

前腕にロールがあるため、繊細な角度調整が可能です。

ビームサーベルはグリップを抜き取って、ダボピンのある持ち手に装着することが可能です。

この持ち手を使用することで、しっかりとサーベルを保持できます。
サーベルの色は特に変更されず、クリアピンクのままです。

ナイフももちろん差し替え無しで展開し、手に持たせることができます。
 とも
ともRGなので、刃先はかなり薄く尖っており、そのままでも格好良い仕上がりですね!
気になる点
ここではRG 1/144 フォースインパルスガンダム SpecIIの気になる点を紹介していきます。
腰部分の前後の可動域
RG 1/144 フォースインパルスガンダム SpecIIの気になる点の1つ目はコアスプレンダーと連結することで、腰を前後に可動できないことです。

もちろん、先ほども紹介した通り、腰を左右に回すことはできます。
ともただ、その他の部位は申し分ない可動域なので、「すごく気になる!」というほどではありませんでした!
アンダーゲート
RG 1/144 フォースインパルスガンダム SpecIIの気になる点の2つ目は、アンダーゲートがあることです。

制作するにあたって、RG特有のアンダーゲートが多少なりともあったため、パーツも細かく、ゲート処理に苦戦しました…。
ともこれは個人的な問題ですが、素組み状態で完成した時にゲート跡が目立たないので大変な分、キレイに仕上がります!
RG 1/144 フォースインパルスガンダム SpecIIを組み立てた感想
今回はRG 1/144 フォースインパルスガンダム SpecIIのキット内容、組み立てたレビュー、特徴や気になる点を紹介していきました!
VPS装甲の色が電圧変化により変わった設定ですが、フォースシルエットの場合、全体的には暗くて洗練された色調に変更されています。
RGフォースインパルスをベースにしているため、プロポーションなども格好良くまとまっており、各部のディテールの微細さや、分離変形による遊びやすさなども非常に優れています。
RG 1/144 フォースインパルスガンダム SpecIIを見つけた際はぜひ購入して作ってみてはいかがでしょうか!

コメント