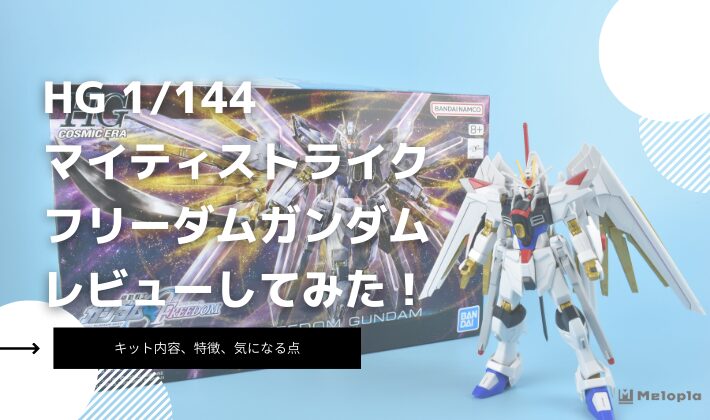
HG 1/144 マイティーストライクフリーダムガンダムを購入しようか迷っているけど、キット内容はどうなのか気になりませんか?
果たしてHG 1/144 マイティーストライクフリーダムガンダムは、
- この値段に見合っているのか
- 初心者でも簡単に作ることが出来るのか
このようなことを購入前に知っておきたいですよね!
そこで、記事ではHG 1/144 マイティーストライクフリーダムガンダムを初心者の目線で分かりやすく徹底レビューをしていきます!
この記事を読むことでHG 1/144 マイティーストライクフリーダムガンダムの特徴や気になる点が分かります!
![](http://gunpla-note-blog.com/wp-content/uploads/2022/11/2022-11-29-14.32-150x150.jpg)
ぜひHG 1/144 マイティーストライクフリーダムガンダムを購入する際の参考にしてみてください!
『機動戦士ガンダム SEEDFREEDOM』に出てくるキラ・ヤマトが搭乗するモビルスーツです。
HG 1/144 マイティーストライクフリーダムガンダムのキット内容
はじめにキット内容を紹介していきます。
![](http://gunpla-note-blog.com/wp-content/uploads/2024/05/2024-05-28-23.53.00.jpg)
![](http://gunpla-note-blog.com/wp-content/uploads/2024/05/2024-05-28-23.46.56.jpg)
発売日 | 2024年05月25日 |
価格 | 2,970円(税込) |
対象年齢 | 8才以上 |
HG 1/144 マイティーストライクフリーダムガンダムの内容物
- HG 1/144 マイティーストライクフリーダムガンダム
- 実剣(フツノミタマ)×1
- ビームライフル×2
- ビームサーベル×2
- サーベル連結状態用グリップ×1
- ビームシールド×1
- ヘッドパーツ×1
- ハンドパーツ×1式
- 3Dメタリックシール×1
- シール×1
HG 1/144 マイティーストライクフリーダムガンダムのレビュー
続いて、組み立て後のレビューをしていきます。
![](http://gunpla-note-blog.com/wp-content/uploads/2024/05/2024-05-28-15.26.58.jpg)
HG 1/144 マイティーストライクフリーダムガンダムの評価
価格 | |
作りやすさ | |
可動域 | |
スタイル | |
ディテール |
※HG(ハイグレード)を基準に評価しています。
※あくまでも一個人の評価です
※「良◎→○→△→×悪」の順で評価しています。
映画『ガンダムSEED FREEDOM』でキラが乗る新しい機体、マイティーストライクフリーダムがHGCEシリーズでキット化されました。
HG 1/144 マイティストライクフリーダムガンダムは、ストライクフリーダム弐式にバックパックであるプラウドディフェンダーを装着した姿です。
![](http://gunpla-note-blog.com/wp-content/uploads/2024/05/2024-05-28-15.46.06.jpg)
背中のプラウドディフェンダーは、今までのウイングとは違い、ホワイトとゴールドのカラーリングで、高級感があります。
![](http://gunpla-note-blog.com/wp-content/uploads/2024/05/2024-05-28-15.44.23.jpg)
HG 1/144 マイティストライクフリーダムガンダムは完全に新しいもので、HGCEストライクフリーダムからのパーツの流用はありません。
特に頭部のデザインが進化しており、パーツの構造や造形がよりシャープで格好良くなっています。
また、キットの構造は最新のもので、ポリキャップやABS樹脂を使わず、KPS素材だけで作られています。
ウイングを広げた姿は、これまでのフリーダムやストライクフリーダムと似ていますが、金色のウイングが挟まれており、白いウイングが展開するとメタリックピンクのフレームが現れるのが特徴です。
![](http://gunpla-note-blog.com/wp-content/uploads/2024/05/2024-05-28-17.23.04.jpg)
HG 1/144 マイティストライクフリーダムガンダムでは、ライフルを腰に装着できますが、ストライクフリーダムのように後ろに回すのではなく、横に付ける仕様になっています。
![](http://gunpla-note-blog.com/wp-content/uploads/2024/05/2024-05-28-15.57.00-683x1024.jpg)
プラウドディフェンダーを外した姿は、HGCEストライクフリーダムより少しがっしりした印象です。
![](http://gunpla-note-blog.com/wp-content/uploads/2024/05/2024-05-28-15.48.12-683x1024.jpg)
色分けは成型色でほぼ再現されており、シールを使うのはビームライフルやプラウドディフェンダーの機首周りや各種センサー類だけです。
![](http://gunpla-note-blog.com/wp-content/uploads/2024/05/2024-05-28-15.58.01.jpg)
![](http://gunpla-note-blog.com/wp-content/uploads/2022/11/2022-11-29-14.32-150x150.jpg)
細かいダクト内部などは塗装が必要ですが、十分な配色が再現されています!
特徴
ここではHG 1/144 マイティーストライクフリーダムガンダムの特徴を紹介します。
各部位の特徴や可動域
頭部アップ
頭部のアップを見てみましょう。
![](http://gunpla-note-blog.com/wp-content/uploads/2024/05/2024-05-28-16.01.08.jpg)
額にはディスラプターがあるため、分割線があります。
アンテナパーツを交換することで、展開時の状態を再現可能です。
![](http://gunpla-note-blog.com/wp-content/uploads/2024/05/2024-05-28-16.05.11.jpg)
このカバーは色分けされていないため、シールで色を補います。
![](http://gunpla-note-blog.com/wp-content/uploads/2022/11/2022-11-29-14.32-150x150.jpg)
しかし、このギミックはパーツを丸ごと差し替える方式なので、簡単に楽しむことができますね!
デザインはシャープで精悍な顔つきになっており、頭頂部のセンサーも別パーツとして作られています。
![](http://gunpla-note-blog.com/wp-content/uploads/2024/05/2024-05-28-23.13.11.jpg)
ただし、ピクウス2 31mm近接防御機関砲は塗装が必要です。
ツインアイや頭頂部のセンサーにはクリアパーツが使われています。
![](http://gunpla-note-blog.com/wp-content/uploads/2024/05/2024-05-28-23.14.19.jpg)
胴体のアップ
胴体部分も新しくデザインされ、一部のディテールが変更されています。
![](http://gunpla-note-blog.com/wp-content/uploads/2024/05/2024-05-28-16.06.37.jpg)
胸部の中央には超高インパルス砲が装備されています。
![](http://gunpla-note-blog.com/wp-content/uploads/2024/05/2024-05-28-23.15.25.jpg)
このパーツはしばしばアレンジされますが、砲口のデザインはシンプルです。
背面のバックパック接続部はスライドロック式になっています。
![](http://gunpla-note-blog.com/wp-content/uploads/2024/05/2024-05-28-23.20.42.jpg)
肩アーマーのデザインも変わり、ライトグレーが使われるようになりました。
![](http://gunpla-note-blog.com/wp-content/uploads/2024/05/2024-05-28-16.08.02.jpg)
肩アーマーの合わせ目は段落ちモールド化されています。
![](http://gunpla-note-blog.com/wp-content/uploads/2024/05/2024-05-28-23.21.21.jpg)
腕部と手
腕部は前腕の造形が変わり、シンプルな箱型からメリハリのあるラインに変わっています。
![](http://gunpla-note-blog.com/wp-content/uploads/2024/05/2024-05-28-16.09.15-683x1024.jpg)
平手は左右両方が付属していて、肩と同様に前腕部分は、合わせ目は段落ちモールド化されています。
![](http://gunpla-note-blog.com/wp-content/uploads/2024/05/2024-05-28-16.10.30.jpg)
![](http://gunpla-note-blog.com/wp-content/uploads/2024/05/2024-05-28-23.22.06-683x1024.jpg)
腰のレールガン
腰のレールガンはストライクフリーダムと同じように折り曲げることができますが、サーベルグリップは上に付くようになっています。
![](http://gunpla-note-blog.com/wp-content/uploads/2024/05/2024-05-28-16.12.03-683x1024.jpg)
また、レールガンの前方は合わせ目が出ないように設計されていて、後方部分は段落ちモールドが施されています。
![](http://gunpla-note-blog.com/wp-content/uploads/2024/05/2024-05-28-23.22.53.jpg)
腰部のリアスカート裏にはディテールはありません。
![](http://gunpla-note-blog.com/wp-content/uploads/2024/05/2024-05-28-23.23.51.jpg)
股関節と脚部
股関節軸は下方向にスイングするようになっており、脚が閉じやすくなっています。
![](http://gunpla-note-blog.com/wp-content/uploads/2024/05/2024-05-28-23.28.03.jpg)
脚部は、ストフリの細めのデザインからふくらはぎ周りが太く、がっしりとした印象に。
![](http://gunpla-note-blog.com/wp-content/uploads/2024/05/2024-05-28-16.20.19-683x1024.jpg)
ふくらはぎのスラスターは常に展開するようになっていて、合わせ目は出ず、考えられた分割がされています。
![](http://gunpla-note-blog.com/wp-content/uploads/2024/05/2024-05-28-16.21.11.jpg)
スラスターの奥もきっちり別パーツ化されています。
![](http://gunpla-note-blog.com/wp-content/uploads/2024/05/2024-05-28-23.24.41.jpg)
足首はつま先も動き、また、肉抜きもありません。
![](http://gunpla-note-blog.com/wp-content/uploads/2024/05/2024-05-28-23.28.41-683x1024.jpg)
![](http://gunpla-note-blog.com/wp-content/uploads/2024/05/2024-05-28-16.25.05-683x1024.jpg)
可動範囲
可動範囲は新しい構造のため、従来のHGCEストフリよりさらに動くようになっています。
肘は深く曲がり、首や腰の前後スイング幅も増えました。
![](http://gunpla-note-blog.com/wp-content/uploads/2024/05/2024-05-28-16.31.55-683x1024.jpg)
![](http://gunpla-note-blog.com/wp-content/uploads/2024/05/2024-05-28-23.09.37.jpg)
肩関節は軸関節の組み合わせとボールジョイントで、跳ね上げや前後スイングが可能です。
![](http://gunpla-note-blog.com/wp-content/uploads/2024/05/2024-05-28-16.30.11.jpg)
腰や肩周りの自由度も高く、ポーズを取りやすくなっています。
![](http://gunpla-note-blog.com/wp-content/uploads/2024/05/2024-05-28-18.18.33.jpg)
脚部の股関節は接地性もさらに良くなっています。
![](http://gunpla-note-blog.com/wp-content/uploads/2024/05/2024-05-28-16.26.59.jpg)
![](http://gunpla-note-blog.com/wp-content/uploads/2022/11/2022-11-29-14.32-150x150.jpg)
ただし、ふくらはぎが太くなったため、膝の曲がり具合は若干制限されますね💦
プラウドディフェンダー(白いウイング)
背面に装着されるプラウドディフェンダーも注目ポイントです。
![](http://gunpla-note-blog.com/wp-content/uploads/2024/05/2024-05-28-16.36.20.jpg)
このパーツには3mmの穴があり、単体でも飾ることができます。
![](http://gunpla-note-blog.com/wp-content/uploads/2024/05/2024-05-28-23.25.31.jpg)
外側のウイングはフリーダムガンダムに似ていて、シャープな三角形のシルエットが特徴です。
![](http://gunpla-note-blog.com/wp-content/uploads/2024/05/2024-05-28-15.46.37.jpg)
展開方法は、まず中央の金色のパーツの上にあるウイングを跳ね上げ、次に外側の白いウイングを回転させます。
![](http://gunpla-note-blog.com/wp-content/uploads/2024/05/2024-05-28-23.27.04.jpg)
そして、各ウイングを開くことで完成します。
![](http://gunpla-note-blog.com/wp-content/uploads/2024/05/2024-05-28-17.23.04.jpg)
この部分にはプラスチックシールを使用しますが、今回のシールは厚みがあまりなく、クリアパーツのような透明感は少ないです。
![](http://gunpla-note-blog.com/wp-content/uploads/2024/05/2024-05-28-16.44.07.jpg)
![](http://gunpla-note-blog.com/wp-content/uploads/2022/11/2022-11-29-14.32-150x150.jpg)
センサーなどに使われる厚いタイプのシールとは異なり、普通のシールに近い印象です!
ウイング自体は基部で回転したり、スイングしたりすることができ、さまざまなポーズを取らせることができます。
![](http://gunpla-note-blog.com/wp-content/uploads/2024/05/2024-05-28-16.45.55-683x1024.jpg)
フツノミタマなどの武器類
ビームライフル
ビームライフルは、ストライクフリーダムのものとほぼ同じデザインですが、少し違いがあります。
![](http://gunpla-note-blog.com/wp-content/uploads/2024/05/2024-05-28-16.48.00.jpg)
腰に装着するためのダボ(突起)などが異なっています。
![](http://gunpla-note-blog.com/wp-content/uploads/2024/05/2024-05-28-23.38.33.jpg)
グリップはどちらも収納可能で、色分けは青いラインや赤いラインがシールで補われています。
![](http://gunpla-note-blog.com/wp-content/uploads/2024/05/2024-05-28-23.39.54.jpg)
合わせ目が出ず、見た目はとても良いです。
![](http://gunpla-note-blog.com/wp-content/uploads/2024/05/2024-05-28-16.49.48.jpg)
グリップもぴったりハマり、ガタつくことはありません。
![](http://gunpla-note-blog.com/wp-content/uploads/2024/05/2024-05-28-17.37.46.jpg)
また、連結も可能で、差し替えなしでギミックが再現されています。
![](http://gunpla-note-blog.com/wp-content/uploads/2024/05/2024-05-28-18.30.43.jpg)
格闘武器
今回の格闘武器には、フツノミタマとビームサーベルがあり、実体剣とビームサーベルの二刀流となっています。
![](http://gunpla-note-blog.com/wp-content/uploads/2024/05/2024-05-28-17.17.04.jpg)
フツノミタマは普段はプラウドディフェンダーに装着されています。
![](http://gunpla-note-blog.com/wp-content/uploads/2024/05/2024-05-28-23.42.56-683x1024.jpg)
フツノミタマの刀身は真っ黒で、HGとしては意外とシャープに成形されており、光沢もきれいです。
![](http://gunpla-note-blog.com/wp-content/uploads/2024/05/2024-05-28-16.51.11.jpg)
![](http://gunpla-note-blog.com/wp-content/uploads/2022/11/2022-11-29-14.32-150x150.jpg)
柄の部分はできる限り色分けされていますが、一部は塗装が必要です!
ビームサーベルは標準的な長さで、腰からグリップを抜き取って使用します。
![](http://gunpla-note-blog.com/wp-content/uploads/2024/05/2024-05-28-16.52.03.jpg)
グリップが抜け落ちることはありませんが、サーベルグリップを腰に装着しているときに、少しレールガンのはめ込みが緩むとポロリしやすくなります。
連結状態は、グリップを丸ごと交換する形になっています。
![](http://gunpla-note-blog.com/wp-content/uploads/2024/05/2024-05-28-23.44.36.jpg)
![](http://gunpla-note-blog.com/wp-content/uploads/2022/11/2022-11-29-14.32-150x150.jpg)
そのため、接続部で曲がることはありません!
ビームシールド
ビームシールドは、ライジングフリーダムなどと同じく、偏光素材で良い質感です。
![](http://gunpla-note-blog.com/wp-content/uploads/2024/05/2024-05-28-18.09.24.jpg)
取り付ける際は、赤いパーツで挟み込むようにして固定します。
![](http://gunpla-note-blog.com/wp-content/uploads/2024/05/2024-05-28-22.17.23.jpg)
気になる点
ここではHG 1/144 マイティーストライクフリーダムガンダムの気になる点を紹介していきます。
プラウドディフェンダーのゴールドのウイング部分
プラウドディフェンダーのゴールドのウイング部分について、気になる点があります。
一番上のゴールドのウイングが劇中のものより小さめに再現されているため、劇中のような迫力を感じにくいという点です。
![](http://gunpla-note-blog.com/wp-content/uploads/2024/05/2024-05-28-23.45.33.jpg)
このため、ウイングを展開した際に期待していた迫力や存在感が少し欠けてしまうことがあります。
このようなデザインの違いは、プラモデルのサイズや構造の制約からくるものであり、全体的なバランスを保つためにやむを得ない部分もあります。
![](http://gunpla-note-blog.com/wp-content/uploads/2022/11/2022-11-29-14.32-150x150.jpg)
この点が気になる方は、カスタマイズや追加パーツの使用を検討することで、より劇中に近い迫力を再現することが可能かもしれませんね!
HG 1/144 マイティーストライクフリーダムガンダムを組み立てた感想
今回はHG 1/144 マイティーストライクフリーダムガンダムのキット内容、組み立てたレビュー、特徴や気になる点を紹介していきました!
HG 1/144 マイティストライクフリーダムガンダムは映画版の主役機ということもあり、非常に力の入った作りになっています。
外観は通常のストライクフリーダムに似ていますが、完全新規で作られており、流用部分はありません。
最新の構造を採用しているため、完成度が非常に高いキットでした!
HG 1/144 マイティーストライクフリーダムガンダムを見つけた際はぜひ購入して作ってみてはいかがでしょうか!
![](https://gunpla-note-blog.com/wp-content/plugins/pochipp/assets/img/pochipp-logo-t1.png)
コメント